How to create and edit posts
Step 1
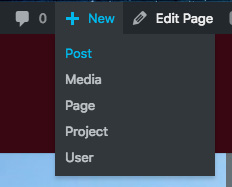
In the dark gray admin bar above, click on +New and choose Post
Step 2
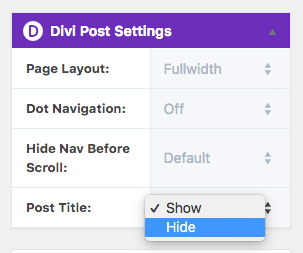
Title Your Post, and then in the Divi Post Settings Box, select Fullwidth for Page Layout and Hide for Post Title.
Step 3
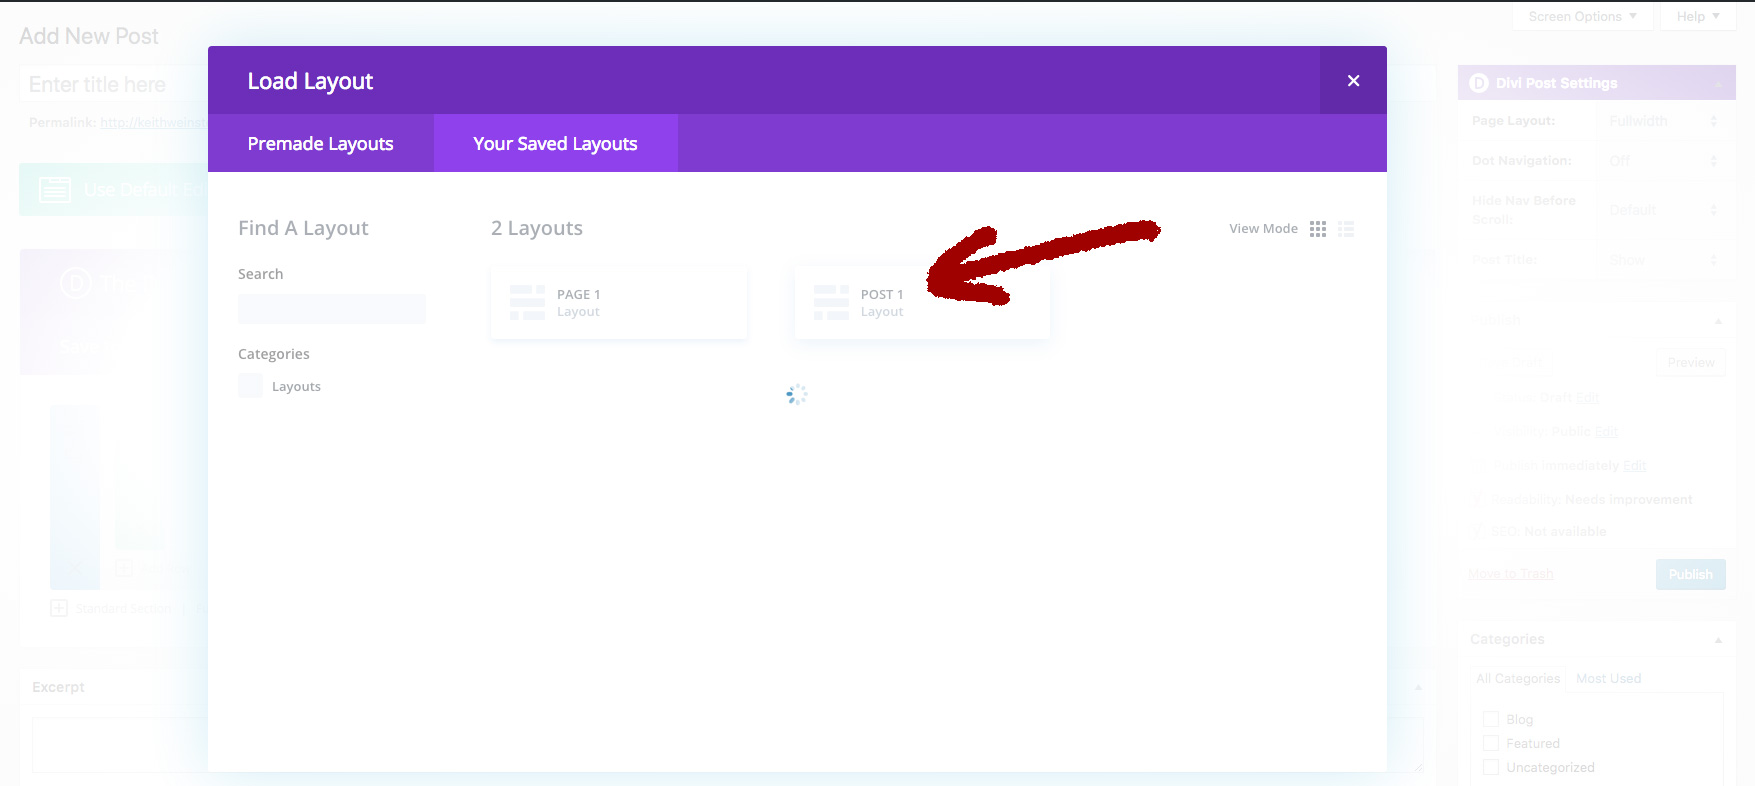
In the Divi Builder, click on Load Layout, then choose Your Saved Layouts and select the template you want to use (for posts use Post 1).
Step 4
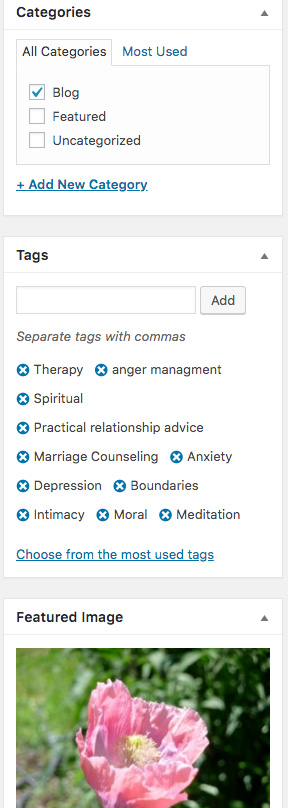
In the right side column, create and select whatever Categories or Tags you’d like associated with this post. Then, upload a Featured Image. Your image should be a consistent size (ideally about 600 pixels wide, 300 pixels tall). Then, scroll up a little and click the blue button that says Publish. This will publish the post, but you aren’t done! You have to add your content. The best place to do this is on the “front end” of the site. Once your post has published, click on View Post in the top dark gray admin bar.
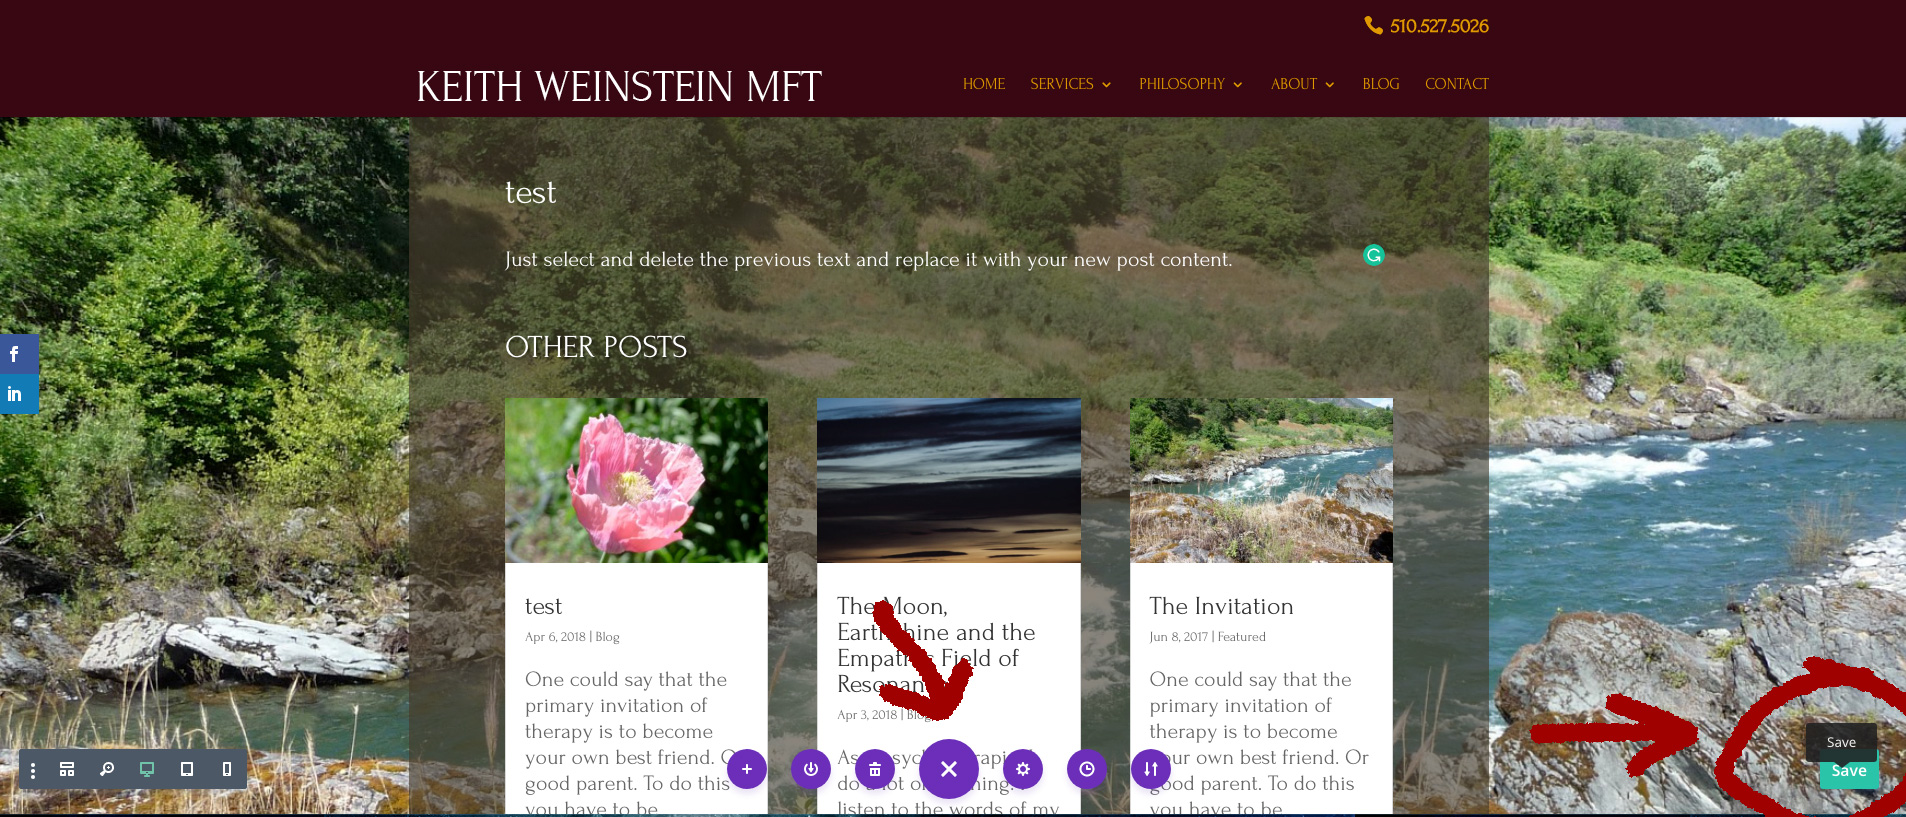
Step 5
You should now be seeing a nicely laid out sample blog post that you will be able to modify with your own new content. To do this you will need to click on Enable Visual Builder in the top admin bar. It will light up purple!
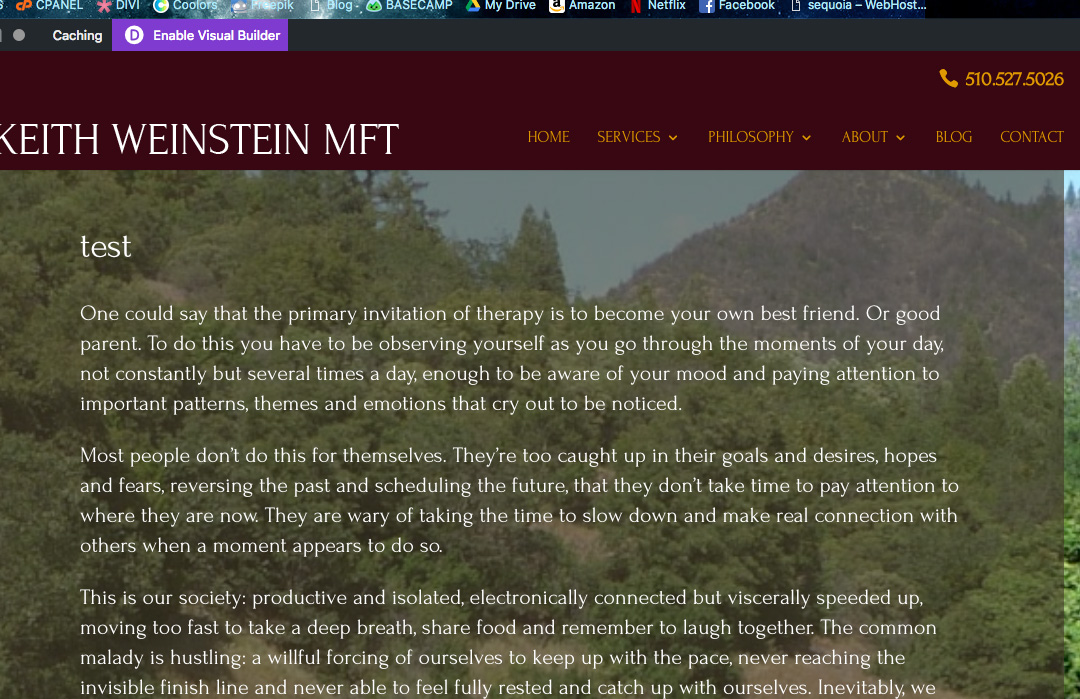
Step 6
You are now in the Visual Builder! You may edit the text simply by selecting it and making whatever changes you’d like, including deleting it to replace it with your new post content. Do not try and change the title at the top of the page – this is automatically being generated from the title of the post.
Step 7
Once you have finished editing, time to SAVE. Click on the round purple button in the bottom center of the screen. This will open a series of controls. Click on the green Save button in the bottom right corner to officially save all of your changes.